Filmmaking is a convergence of art,
technology, and business. The art of film is the primary concern of
the Director. The technology of film is the primary concern of the
Director of Photography (in production) and the Film Editor
(post-production). The business of film is the primary concern of
the Producer. The cast (those in front of the camera), and crew
(those behind the camera) can number into the hundreds or thousands
for a large feature, or less than a dozen for an independent short
film. Whether a film is large or small, someone must fill the roles
required to complete the project. For a short film, often players
take on multiple roles. Below is a brief introduction to the primary
roles required for a film. The list is divided into above-
and below the line. Above
the line refers
to the creative
costs paid or negotiated in development and preproduction. It
generally refers to the costs associated with the principle cast and
crew members. Below
the line refers
to the technical
costs of production, post-production, and distribution.
Above
the Line (the principle cast and crew):
Screenwriter – The
Screenwriter, sometimes called the scriptwriter, writes the script.
In many films, the Screenwriter is also the Director.
Producer – The Producer
handles the business aspects of creating a film such as budgeting,
financing, scheduling, legal paperwork, cast and crew contracts,
copyrights, insurance, “Errors and Omissions,” etc. The producer
works primarily with the Director, Production Manager, Publicist and
Distributor. The Producer works with the Director to generate a
budget and schedule, and secure the financing required to finish the
film. The Production Manager manages the scheduling and funding for
the Producer. A wise producer will not move forward with the film
until at least 100% financing is available to complete the principle
photography. Ultimately, the producer represents the audience. The
typical movie-going audience is 15 to 25 years old. A successful
film is a convergence of a great script, great director, and a great
cast. The successful producer does all he can to see that these
three aspects of filmmaking are maximized and delivered to the target
audience.
Director – The Director
handles the artistic aspects of creating a film. In addition to
working with other production heads, the Director also assembles his
personal team of the Assistant Director, Production Designer,
Casting Director, Script Supervisor (continuity), Location Manager,
Storyboard Artist, and the various Production Assistants (PA's).
Actors – The actors bring life
to the characters in the script. A character can be a person,
animal, or thing. The lead actor and other starring roles are
considered above the line. Secondary actors and “extras” are
below the line.
Below
the Line (non-starring cast members and technical crew):
Production:
Assistant
Director
(AD) – The AD works with the Director and the other secondary
directors to help coordinate the many tasks occurring during
production.
Director
of Photography
(DP, or cinematographer) – The head of the camera and lighting
crews. The DP works closely with the director to use the available
technologies to achieve the artistic goals of the director.
Camera
Operator
– The head of the camera crew. The camera crew consists of the
Camera Operator, First Assistant (focus puller), Second Assistant
(clapper/loader), Dolly Grip, and other camera PA's and grips.
Gaffer
– The head of the electrical and lighting crews. The lighting crew
consists of the Gaffer, Key Grip, Best Boy, and other PA's and grips.
Production
Designer –
The Production Designer is responsible for creating the physical
aesthetics of the film: Art Director (sets), Costume Director
(costumes), Properties Manager (props), Makeup Director, Hairdresser,
etc. The Production Designer works closely with the Director and DP
to achieve the 'look' of the film.
Art
Director –
The head of the Art Department. The Art Department includes the Set
Designer, Set Decorator, Set Dresser, Property Master, Head
Carpenter, Greensman, etc.
Second
Unit Director
– The Second Unit Director is responsible for shooting the
secondary footage in a film.
Production
Sound Mixer
– The Sound Mixer works with the Sound Engineer, the Boom Operator,
and various sound grips to capture the ambient sound and/or dialog
during production filming.
Catering
– The caterer provides hydration and food during the production.
Post-production:
Film
Editor
– The Film Editor uses the film footage created by the Director and
DP, and cuts it into the final image we see on the screen.
Sound
Designer –
The head of the Sound and Music Department. The sound designer works
with the Dialog Editor, Sound Editor, Re-recording Mixer, Music
Supervisor, ADR Editor, and Foley (sound effects) Editor.
Distribution:
Publicist
– The Publicist generates interest in the film through advertising,
posters, press releases, Internet, interviews, film festivals,
“publicity stunts,” etc.
Distributor
– The Distributor ensures the film is shown in as many venues as
possible.
Back to Top
For most budding independent Christian filmmakers, film is cost
prohibitive. That leaves us shooting video. With high-definition (HD)
costing at least five times as much as standard-definition (SD), I
think SD deserves a closer look. Besides, in the final analysis, HD
is just another feature of a video camera. Which camcorder will best
suit your needs is largely a matter of application. The major uses
for camcorders are independent filmmaking, electronic new gathering
(ENG), event videography (weddings, etc.), and commercial video. I
say this, because while most of us are most interested in filmmaking,
videography for money is a good business, or can at least offset the
costs of equipment and production. The good news is that the features
that make a good filmmaking camcorder are usually a superset of the
features needed for the other uses of a camcorder.
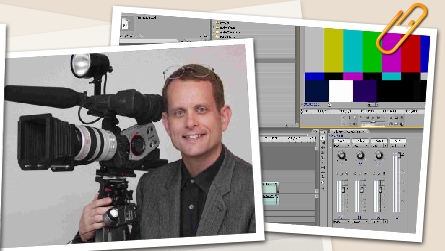
Camcorder
Anatomy
At its core, a video camera has various building blocks that
create this thing we call "camcorder." Please bear with me
while I discuss the anatomy of the camcorder. There are two main
paths through the camcorder: one path for the pictures, and one path
for the sound. The picture path starts at the lens where the light
from the subject is focused, stopped, stabilized, and filtered onto
an image sensor. The image sensor (or sensors) amplifies and converts
the events of photons hitting it into a digital data stream of 1's
and 0's. The data then is fed into an embedded Digital Signal
Processor (DSP) computer inside the camcorder. The computer processes
the data stream, interlaces it with the audio data, and writes the
data to a storage device. The data is also sometimes converted into
other electronic standard signals and passed out of the camcorder,
and to an on-board monitoring device (e.g. LCD viewfinder). Most
camcorders are designed to give the user direct access to the
on-board storage device (VCR mode). The sound is captured with a
microphone. The microphone converts the sound into an electronic
analog signal. Most camcorders are also designed with direct audio
inputs. The analog signals are then mixed together, amplified, and
digitized into a stream of 1's and 0's. As already stated, this data
stream is merged with the video. Now we have that out of the way,
let's look at each of the building blocks and discuss the options
available. (This could also be titled, “101 Reasons Why You Get
What You Pay For.”)
Lens
Unquestionably the single most important part of the camcorder is
the lens. The single most important part of the lens is the front
element. This is where the light enters into the camcorder. If it is
too small, not enough light gets in. When selecting a camcorder, the
first question should be, "What is the filter size?" With
an honest manufacturer, the filter size usually is an indicator of
the size of the front element. Larger is almost always better. The
size of the front element has a bearing on the “speed” or
“f-stop” of the lens. The speed is basically an indicator
of the ratio of the largest aperture of the lens with its focal
length (I realize it is technically something totally different, but
this is a good analogy for this discussion). Therefore, the longer
the focal length, the larger the front element must be. That is why
professionals go for the better “glass.” The lens
coatings and materials are also very important. Canon uses fluorite
in their lenses. Generally, the best video camera lenses are made by
(not necessarily in order) Fujinon, Canon, Leica, and Carl Zeiss.
This narrows our discussion to JVC, Canon, Panasonic, and Sony.
The
exposure in a camcorder is controlled by the iris, shutter speed,
gain, and neutral density (ND) filters. All camcorder lenses have an
iris (also called the aperture in still photography). The only
feature of interest here is that it must be easily manually
controlled. Manual controls of iris, shutter, gain, focus, audio
levels, etc., are critical for filmmaking. Nothing screams amateur as
loudly as automatic controls on while filming. Actually, camcorders
do not have shutters, only shutter speeds. The shutter speed is, in
fact, the speed at which the embedded microprocessor reads the data
from the image sensor. Low shutter speeds (1/8th second) are useful
for maximum exposure in low light, or for the smeary “music
video” faux slow-motion effect. High speeds (10,000th) are
useful for stop motion sports. Normally, a camcorder shooting 60i has
a shutter speed of 1/60th, and at 30p a speed of 1/30th second.
Normally, 24p film has a shutter speed of 180 degrees, or 1/48th
second. I shoot 30p at 1/30th and am happy with the
film-likeness--after all, as much as we might wish otherwise, video
is at best only an approximation of film. Also, film is usually shot
at f8 to f11--not much depth of field. External ND filters and
lighting are used to control exposure. The gain setting controls the
amplification of video amplifiers in the sensor circuitry. The higher
the gain, the more noise...better to have more light and less gain.
High wattage lighting is important for low-noise video. The most
important control for gain is that it can be set to 0 and left there.
The ND filters decrease the exposure without changing the iris,
shutter speed, or gain. This gives the videographer more control of
these settings even in bright sunny exterior shots. This is a good
feature to have on a camcorder, but alternatively, ND filters can be
added to the front on the lens.
The elements inside the lens
are controlled with focus and zoom. It is important to have the
ability to control the focus and zoom remotely. This is important
when using a tripod. This can be accomplished with most low-end
camcorders with a LANC controller. Higher-end camcorder lenses have
special controls. All lenses (I have yet to see a pinhole lens for a
professional camcorder) have the ability to change the focus
distance. The important feature here is a focus ring--preferably one
that actually controls the lens, and not a servo motor. Lenses are
either prime focus (no zoom) or zoom. A zoom lens allows the
videographer to change the focal length of the lens. Again, an
important feature is a zoom ring--again, preferably not a servo motor
actuator. The servo controlled focus and zoom of the Canon XL lenses
is their greatest drawback. Temperature changes cause the electronics
to drift and move the focus. Yes, the 20x has a focus or zoom preset
feature, but the speed cannot be controlled, and it is only one
setting. It cannot rack focus alternatively between two subjects!
The last feature of a lens is image stabilization. This comes
in two varieties: electronic and optical. Always look for optical
stabilization. This is a great feature for hand held shooting. The
important control, as always, is the ability to turn it off. When
mounted on a tripod (where the camcorder should live most of the
time), the optical image stabilizer can drift or hunt, causing the
picture to move even though the tripod is locked down.
Lens
Adaptors
There is no shortage of telephoto and wide angle lens adaptors.
However, to spite the manufacturer’s claims to the contrary,
there are NO one-size-fits-all adaptors. There are a few made for
specific lenses. Of these, Schneider and 16x9 are considered the best
manufacturers. That said, the best telephoto or wide angle adaptor is
no adaptor. The most important part of the lens is the front element,
but the other elements are specifically designed to work together in
harmony. Placing an alien lens in front of the front element wrecks
that harmony. At best, it is adds distortion, at worst, it causes
vignetting and all kinds of other aberration. For this reason, I
highly recommend a camcorder that uses interchangeable lenses where
each lens is designed for a specific purpose.
There are also
back-end lens adaptors. These either magnify the focal length, or
allow other lenses to be mounted. So far, I haven’t needed any
magnification. The stock Canon 20x lens has an effective 35mm focal
length of over 1000mm. However, most stock camcorder lenses need a
wide angle on a regular basis. Personally, I would stay with the
camcorder manufacturer for all the lenses. Sorry, but I do not get
excited spending hundreds of dollars to mount a $50 35mm f3.3 Nikon
eBay special on a Canon XL-2. The stock 20x f1.6 Canon XL lens has
plenty depth of field for me.
Sensor
The sensors are noted by their underlying technologies: CCD and
CMOS. In a CCD, the image is stored in a huge analog shift register
and read out one pixel at a time. Because of this, the entire image
passes through one amplifier. Each pixel on a CMOS sensor has its own
amplifier. In this regard, the CCD levels are slightly more
consistent pixel to pixel because they use only one amplifier. The
Hubble Space Telescope uses CMOS technology--of course NASA has a lot
of computers to analyze and readjust the pixel levels where needed.
For all the benefit of the CCD sensor amplifiers, they exhibit a
nasty anomaly called vertical smearing. CCD sensors are generally
less expensive, but use more battery power than CMOS. Usually
CMOS-based camcorders marketing literature brag about their video
processor. This is of necessity due to the amplifier problem. Usually
the CMOS sensors and ensuing processor cost more. All said, a single
CMOS sensor is almost as good as three CCDs--but not quite. The best
configuration is three CCD sensors. Here, a beam splitter prism
divides the light for three sensors. One sensor for each color: red,
green, and blue. The size and pixel count of the sensors is
important. The size is important because the larger the sensor, the
more light hitting each pixel. This reduces the noise level. The
greater the pixel count, the finer resolution of the image. Of
course, a 100 megapixel sensor is useless if the lens is not able to
deliver commensurate resolution. Likewise, the lens and sensor
resolution are of non-effect if the ultimate storage medium is not
able to capture all the data. The 4:1:1 DV standard is severely
limited when compared with film. There quickly comes a point where
more megapixels are pointless. The current offering of upper-end SD
camcorders is pretty much at the limit of the DV storage medium.
Processor
The main difference between a $3,000 and $30,000 camcorder (other
than sensor and lens) is the processor. As alluded to earlier, the
processors for CMOS are usually more powerful, but because the CMOS
technology require it. For the independent Christian filmmaker, the
processor features to look for are those that allow the video signal
to be enhanced. Inane features such as sepia, pixelization,
whirlpool, etc., are a waste of processor power and show a lack of
regard for the true artist. Zebra pattern is sometimes useful in
changing light conditions (e.g. event videography) where you need
know if details are being lost in the highlights. Some camcorders
have a “skin detail” function. This analyzes the picture
for the color of skin, and softens the details in these areas. This
can take years off the appearance of subjects. A soft/fx or black
mist filter on the lens is a usually a better solution, however. The
more useful processor functions allow the videographer to adjust the
parameters of the video signal. I am most familiar with the Canon
XL-2. Here is my take on the processor options for it:
Gamma
curve: the normal video gamma is artificially brightened. A flatter
gamma more resembles film.
Knee point: think of this as a
compressor/limiter in an audio chain. It helps keep the highlights
from blowing out. Film has a natural knee.
Black press: think of
this as a noise gate/expander in an audio chain. The shadows are
pressed to black.
Black stretch: emphasizes contrast in the
shadows (I’ve never thought of a use for this).
Color
matrix: readjusts the color matrix (gamut) for cine. It seems to make
the signal somewhat orange.
Color gain: controls the saturation
of the colors. Cutting the color saturation is better done in post.
Color phase: Never The Same Color hue adjustment. A feature for
feature’s sake.
R, G, and B gain: this should not need to
be adjusted, but it is nice to have in case.
Vertical detail:
applies a filter to the vertical signal. This can help with NTSC
composite color crawl, but at the expense of loosing detail.
Sharpness: normal video has artificial sharpness. This is a nice
feature to be able to lower the artificial video sharpness to look
more like film.
Coring: allows the operator to balance between
detail and noise.
Setup level: adjusts the overall latitude of
the picture. Sort of like a brightness control.
Master pedestal:
adjusts the overall contrast of the picture.
Noise reduction:
analyzes consecutive video frames to factor out noise from the
picture.
After the picture is processed, the video data
signal is compressed and merged with the audio signal to be written
to the storage medium.
Storage
Currently, video is stored in some form of DVD, helical scan
tape, or hard drive. First, we will discuss SD storage. Of the
storage technologies, the DVD is the most compressed, and has the
most distortion. DVD compression is based on MPEG-2 interframe
compression. Frankly, this is too much compression for further
editing for anything but aunt Ethyl’s 65th birthday. The most
common helical scan tape storage is based on the DV standard. MiniDV
is the same as DV on smaller 6mm tapes. Digital-8 is the DV standard
stored on Hi-8 tapes. DV uses Discrete Cosine Transformation (DCT)
image intraframe compression, and 4:1:1 color subsampling
compression. Intraframe compression means each frame is independently
compressed. The interframe compression of MPEG-2 uses some frames as
base frames, and other frames build on the information in the base
frames. While DV is an improvement over MPEG-2, it is still missing
significant details. In fact, analog Betacam SP has slightly better
chroma accuracy than DV and without the digital artifacts. The 4:1:1
nomenclature refers to the color subsampling. The human eye perceives
luminance (brightness) in greater detail than color. Of the three
colors, red, green, and blue, the eye perceives the greatest detail
in the green spectrum (the human eye has three color sensing types of
nerves called cones. Two of the three cones sense green light).
Therefore, for every six data bits written to tape four bits are Y’
(luminance), one bit is Cb (blue information), and one bit is Cr (red
information). As we know, luminance is the sum of the red, green, and
blue signals. Therefore, the green signal is derived from the Cb and
Cr being subtracted from Y’. Since there are four luminance
bits and one each red and blue bits, the green actually has more bit
information, thereby rendering greater perceived picture detail.
Brilliant. There is also a 10-bit 4:2:2 standard. It uses four bits
for luminance, and two bits each for red and blue. It is nearly
indistinguishable from the full 4:4:4 standard, but uses 1/3 less
bandwidth.
The HDV standard uses the same DCT spatial
compression and 4:1:1 chroma subsampling compression as DV, but also
adds the MPEG-2 temporal interframe compression. Because the MPEG-2
compression is added to the signal, it is able to still be written at
the same bit rate as DV. This should set a chill up your spine right
about now. It is difficult to recommend any standard--SD or HD--that
uses 4:1:1 for independent filmmaking intended for theatrical
release, and even more difficult to recommend a standard that uses
interframe compression for any mission critical
application--especially considering it is written to a 6mm tape. For
this reason, I have decided to wait on HD (or rent) until I can
afford a 4:2:2 camera with a lossless hard disk recorder (OK, I may
buy a cheap used HDV such as the Sony HVR-A1U--actually used Z1Us are
going for less than $2,600 on Craig’s List). Until then, I
intend to stick with my XL-2 and let the HD market mature some more.
Sound
The quality of sound for video is at least as important as the
quality of the video. If you don’t believe me, watch your
favorite movie once with the sound turned off. Now play it again with
the sound on, and the video off. Get the point? Assuming the video
will be edited, the sound should also be edited (see the forum post
on sound recording). The recording should be captured and recorded as
loud, with as flat and wide a frequency response, and with as little
noise as possible. Level adjustments, equalization, compressions,
reverb, etc., are made in post, not in the recording. Capturing good
sound requires a good microphone. Since the microphone is seen in
video, either a really small microphone (usually wireless) must be
used, or a highly directional microphone must be used off-camera.
Either way, the signal going to the camera must be balanced. The
better microphones require phantom power. Hence, the camera must have
XLR audio inputs with phantom power, or use an XLR converter with
phantom power. Some camcorders have an automatic level control. This
must be turned off.
Conclusion
Based on this knowledge, feature sets can be matched with
application. For the independent Christian filmmaker, it is not bad
for a camcorder to have automatic features. It is important, however,
that the automatic features can be overridden.
For us, the
following features are most important:
• Lens: prefer
interchangeable, good glass and coatings, large front element (low
f-stop), manual iris, shutter, and focus. If present, image
stabilization must be optical with override.
• Sensor: 3CCD,
1/3” or better, high pixel count.
• Processor: excels
at basic video processing, limited or no special effects, prefer
4:2:2 compression chroma subsampling compression.
• Storage:
prefer outboard hard drive, miniDV backup.
• Sound: prefer
XLR inputs and phantom power.
The miniDV market is replete
with point and shoot camcorders masquerading as useful tools. The
lowest price camcorders that fill most of the feature set for
cinematic video are the Canon XL and JVC GY-DV5xx series. I bought my
XL-2 on eBay with the 20x lens for $2,550 including shipping. I also
picked up the 3x wide angle lens for around $700--the same price of a
good wide angle adapter. I have seen the JVC GY-DV500U for under
$2,000 including a fully manual S14x7.3B12U Fujinon lens. Your
mileage may vary. The lower end/fixed lens camcorders with varying
degrees of usefulness are the Panasonic GS400 (discontinued), GS500,
Canon Optura 50 or Xi (discontinued), Optura 60, or Sony HDR-HC1
(HDV, discontinued). It is a shame the models with manual friendly
controls are being replaced with more automatic point and shoot
models. In the low-mid range are the Sony VX2100 or HVR-A1U (HDV).
Personally, I’ve never been impressed with the Canon
GL-2--perhaps it is the 1/4” sensor. Slowly working up, the
Sony PD-170, Panasonic DVX-100B, Sony FX-1 (prosumer) and Z1U
(semi-pro). Above this, I’m still waiting for a decent HD 4:2:2
camcorder to emerge under $5,000 street price. It may be a few years.
Until then, as the Lord so blesses, I will rent a Panavision/Sony
CineAlta for my theatrical release.
Back to Top
There is some misunderstanding about the technologies available to
us Christian “filmmakers.” Which is the best? Well, that
depends on what you intend for the final product. First, let us
briefly examine the capabilities of the technologies:
Human
eye: chromatic spectrum 380 nm to 700 nm; incredible latitude (20
stops – 1,000,000:1); high resolution; constantly adjusted for
brightness, chromatic temperature, etc.; near instant focus; less
sensitive to color in low lighting; tri-chromatic color cones (420
nm-blue, 534 nm-bluish green, 564 nm-yellowish green), and low-light
rods (498 nm); three dimensional interpretive; motion
Film:
S-shaped gamma; negative and positive; black and white; color;
infrared; sepia; silver halides; low to medium latitude (7 stops –
128:1); CMY based color; excellent color gamut; two dimensional
reflective; still and motion (24p); RGB color space
Analog:
Iconoscope->Vidicon; edge sharpness (except Plumbicon); vacuum
tubes; irregular gamma; very low resolution and latitude (5 stops –
32:1); smearing; halo; RGB based color; limited color gamut; two
dimensional light sourced; motion (60i); NTSC color space with chroma
overlapping the luminance
Digital: CCD and CMOS technologies;
low to medium resolution; low latitude; linear gamma (adjustable in
some cameras); RGB based color; limited color gamut; vertical
smearing (CCD); edge sharpness; two dimensional light sourced; still
and motion (60i, 30p, 24p); miniDV is 4:1:1 color space
As we
can see, film is far superior to video in the areas of resolution,
color gamut, and latitude. For a video sensor to achieve the
resolution of 35 mm film, it would have to be over 35 megapixel! Even
if a sensor were available with 35+ MP, video still falls woefully
short of the latitude and color gamut of film. However, this superior
performance comes at an exceedingly high price. By the time film is
shot, developed, copied, color corrected, and released, it costs well
over $1 per foot. At normal 24 fps, 1,000 feet of film lasts about 7
minutes. Film easily exceeds $10,000 per hour of finished
product--just for the film. Add to that the cost of the camera, extra
lights, etc. Just a film magazine for a 16 mm camera averages $7,500.
If that weren’t enough, film editing is a nightmare compared to
video non-linear editing (NLE). In film, a simple dissolve can cost
$2,000, and take up to two weeks to complete start to finish.
Contrast film with video tape. A high-end professional 60 minute
blank HD tape sells for less than $100 and can be reused. In most
video NLE systems, merely overlapping two video scenes instantly
creates a dissolve. However, despite the economies of time and money,
it will be a long time before video totally supplants film (film may
never completely go away, I am amazed at how many high-end audio
amplifiers still feature tube circuitry). First, companies that
regularly use film have made the investment in film and cameras and
are accustomed to paying the high prices. As high as they are, the
film production costs of a feature are a small part of the total
equation. Also, these companies are experts at scheduling and
resource utilization so that the impact of film editing is minimized.
(Ironically, most studios these days use NLE to generate the edit
decision lists (EDL) used by the film processing labs to generate the
final film edit.) Digital is coming, yes, but most movie projection
houses are currently fully entrenched in film. It will be a while
before the projectionist is replaced by the information technology
(IT) department.
However, because of the high costs, unless a
customer specifically requests film and is willing to pay many times
the cost, or, I know for sure what I am producing will be distributed
in theaters, I intend to stick with video for the foreseeable future.
OK, so we use video: standard definition (SD), or high definition
(HD)? Answer: yes. Again, each technology has its benefits and costs.
Where film has 50 to 500 times the cost of SD, HD currently adds at
least 5 times the cost. This is due to the requirements for more
expensive cameras, lenses, and monitors, as well as the increased
requirements for computing power and hard drive space. If the video I
am producing will be viewed primarily on the “small screen”
of television (either 4:3 or 16:9) or internet, SD is adequate for
most applications. Low end HD is recorded to HDV tapes. This tape has
the same 13 Mb/s bandwidth of DV. DV is already overcompressed, and
HDV compresses the video to a ridiculous level. On the other hand, HD
affords several advantages. HD can always be released as SD. Footage
shot and edited in HD and released in SD gives the editor more
freedom to enlarge and otherwise manipulate the image during the
edit, if needed. For now, my money is in getting the best SD I can
afford, with the intention of migrating to HD when I can better
afford it. That said, I recently attended the 2006 Christian
Filmmakers Academy (www.independentchristianfilms.com). There, David
Rasmussen (Mt. Everest, National Geographic) discussed his recent
trip with the British Army expedition to ascend Mt. Everest. He used
exclusively the Sony HVR-A1U and Z1U cameras--both HDV format. He
said they worked flawlessly, even in the miserably cold temperatures
of the mountain and in the rain forest humidity conditions inside his
tent. If I were to buy (or rent, in the case of the Panavision) an HD
camera today, it would be either the Sony HVR-A1U (low end), Canon
XL-H1 (mid-grade, saved direct to disk in 4:2:2 AVI), or
Panavision/Sony HDW-F900 (high-end).
Film is superior.
However, given the economies of resources and time of video,
producing a film-look in video is a worthwhile effort. To achieve a
video that gives the impression of film (at least on the small
screen) requires attention to many details. To create a film look in
video requires the videographer to first think like a
cinematographer. This means using light and composition to paint a
carefully crafted image where each frame is a work of art in itself.
If video tapes were non-reusable and cost $10,000 each, videographers
would have a whole different outlook on the quality of what they
shoot. This means avoiding the use of fast pans and tilts that cause
jerkiness in the 24 fps of film. This means almost never changing the
focal length of the zoom lens while filming: instead using dolly and
truck movements. This means rarely using hand-held shots. This means
never, except for special effect, using the automatic features on a
camera--auto iris, shutter, focus or automatic level control (ALC) in
the audio. This means using filters--ND, polarizer, color, etc.--to
their fullest artistic efficacy. Next, the videographer must coax the
camera to think like film. This means setting the camera to capture
the image as film would capture it--allowing for the shortcoming of
video. If the camera allows it, for a true film look, set it for 24P.
That said, I shoot for film look at 30P as my work is rarely actually
is transferred to film. Next, the gamma curves must be set in the
“cinematic” setting (assuming the camera has this
feature). “Sharpness” is a throwback from the analog
Vidicon tube days that is still built into modern cameras intended
for television. Film is not inflicted with sharpening, turn it off. A
soft/FX2 or black dot filter helps with sharpening. Lastly, the
videographer must edit like a film editor. This means using mostly
straight cuts, with minimal dissolves (remember, in film they cost
$2,000), and vanishingly few special effects such wipes, etc. It
means the color balance is impeccable. Most titles are white letters
on a black, or otherwise simple, background. It also means cutting
scenes to less than seven minutes--the length of a 1,000 foot reel of
film. It means the audio is flawless. To make video look like film,
critically study masterpiece films to emulate, and then use these
examples to innovate.
As we can see, film is king when it
comes to performance. However, the costs associated with film make it
prohibitive to most small budget filmmakers.
Back to Top
In video production, few things are more critical, yet less
understood than good audio. The Christian videographer or filmmaker
has a very important message to tell the world. Don’t let bad
audio detract from your message. This article helps you make the best
possible audio for your important messages. The topics discussed here
are microphones, audio recording, and post-production processing.
Sorry, but I have bad news. The microphone that came with
your camcorder is at best marginally useful, and should generally be
used as a last resort. An in depth discussion of the reasons are a
little beyond the scope of this article, so I’ll just make a
few blanket statements, explain them somewhat, and ask that you trust
me on the details. The minimum audio kit should have a good quality
condenser shotgun microphone with a balanced (XLR) plug, and a
shock-mounted boom. If you plan to do weddings, and some interview or
training situations, you may also need a wireless microphone. I’ll
cover more on wireless later. If your camcorder has only unbalanced
mini-plug inputs, the first order of business is to get a converter
such as the Beachtek DXA series. This device converts the XLR output
of the microphone to the unbalanced mini-plug on your camcorder, and
supplies phantom power. As your experience (and budget) grows, you
should seriously consider getting a camcorder with XLR inputs. OK,
with an XLR microphone, we are half way there...literally. The next
order of business is to get a microphone that is off the camcorder
and as close as possible to the sound source. In an interview for
instance, we need to capture the sound of the talent, and nothing
else--not even the reflections of the sound off the walls. But
because the sound captured by the camcorder microphone is too far
from the source, it captures the ambient room reflections with too
much strength relative to the sound source. This causes the “in
a barrel” sound coupled with the ambient noises in the room
that scream “amateur!” In the case of an interview, and
most movie dialog, this means using a high-quality shotgun condenser
microphone in a shock-mount on a boom.
Sound travels in waves
much like the ripples emanating from a pebble thrown into the waters
of a still pond. That part most people already know. What most people
don’t know is that the strength (amplitude) of the waves
dissipate at what is called the “inverse square” law.
This means that as a given distance is doubled, the strength of the
wave decreases by 1/4th. As the distance is tripled, the strength
decreases by 1/9th, and so on. In simple terms, sound amplitude
decreases dramatically as the distance from the sound increases (this
same law applies to unfocussed light intensity, also). For this
reason, the microphone must be as close as possible to the sound
source. A “shotgun” microphone is one that is highly
directional. The high directionality of the shotgun microphone picks
up only where it is pointed, and rejects sound coming from other
directions. This, combined with the microphone being placed close to
the source all but eliminates the room ambience and reflections.
Great. Now that we have the sound source and nothing but the
sound source, we are getting closer to the truth. The next priority
is to ensure we are capturing the best quality signal. This means
that, for most applications, we need to use a condenser microphone. A
condenser microphone uses a very thin and light diaphragm to capture
the sound. The lightness helps it accurately capture every nuance of
the sound. However, the condenser technology makes an extremely small
signal. It requires an amplifier built into the microphone to
pre-amplify the signal before sending the signal to the camcorder.
This is called a head amp. The head amp requires power to operate.
Some microphones use built-in batteries (which seem to die at the
most inopportune times), others use “phantom” power.
Phantom power is a 48 volt direct current (48 VDC) power source that
is supplied by the camcorder (or Beachtek preamp). Even though the
condenser microphone has a tiny amplifier built into it, the signal
is still very weak. Because of this, it is easy for stray
electromagnetic interference to cause noise in the cable leading from
the microphone to the camcorder. Using the magic of differential
amplifiers, audio engineers are able to eliminate most of this signal
noise. However, only XLR cabled microphone use differential
amplifiers. Hence, I recommend condenser microphone with phantom
power and an XLR connector.
Not all microphones are created
equal. If you are on a super-low budget, audition the shotgun
(sometimes called hypercardioid) microphones from Azden, Audio
Technica, Sony, Shure, or CAD. Otherwise, the better brands are Rode,
Sennheiser, Beyerdynamic and Electrovoice. On the top end are
Neumann, AKG, and Shoepps. There are plenty of junk microphones. If
the price is lower than these, it may not be worthwhile. As with most
things, buy the best you can afford.
For a boom, I use a
boom-type microphone stand that allows the post and boom to be
removed from the base and used independently. With this, I can set it
on the floor in the base as normal, or remove it from the base and
use it overhead holding it by hand. An aluminum stand is lighter and
easier to hold overhead. Of course, you can also buy a boom (and
blimp) specifically designed for a shotgun microphone. The more
directional the microphone, the more it is affected by handling
noise. For this reason, it is critical that shotgun microphones are
shock mounted. When using the shotgun and boom, keep the microphone
off-camera, and point the microphone at the speaker’s chest.
For weddings, and certain other situations, a wireless
“clip-on” lavaliere microphone is usually required. I
recommend the Sennheiser EW100ENG G2, although I hear Shure, Telex,
and Sony also manufacture good systems. Whichever wireless you
choose, unless there is a specific reason to do otherwise, I
recommend lavaliere with an omnidirectional pattern
(non-directional), and a UHF transmitter/receiver with multiple
channels. In a wedding, the microphone is clipped onto the groom’s
lapel about 6” down from his neck on the right side (assuming
he is standing to the clergy’s left) so that the microphone
picks up the groom, the bride and the clergy. Put fresh batteries in
the transmitter, turn it on, and instruct him to never turn it off.
In my experience, directional (cardioid) lavaliere microphones have
inferior frequency response. By placing the microphone 6” from
the speaker’s mouth, most of the problems with distance (room
reflections, ambient noise) are eliminated. Be sure the microphone is
placed close to the mouth and not half way down the chest. This will
result in bad audio.
The audio may be recorded in the
camcorder and/or with another recorder. If using two recorders
(camcorder/outboard recorder), you will have to synchronize the sound
to the video in post production. The main reason for outboard
recording is to record more than two channels, such as 5.1. This is
beyond the scope of this article. If you need more channels, consider
premixing the channels down to two channels. A good premixer is the
Mackie 1202. If you are using outboard recording, or an outboard
premixer, consider using a dynamic range compressor. Set the
compressor with a 1:2.3 ratio, and a -10 dB threshold. Unless there
is a specific reason to do otherwise, I recommend using at least
16-bit recording. Some camcorders allow four channels of 12-bit
recording. However, this results in a noisier signal. The goal in
recording is to capture as loud of signal as possible without
overloading the signal. If the level is too low, the recording can
become noisy. If the level is too high, it can clip and distort.
Digital audio distortion is extremely bad. To “help” with
this, recorders have a “feature” called automatic level
control (ALC). Turn it off. Instead have the talent talk (or make
whatever sound they make) at the level they will be using while
recording, and set the volume controls such that the peaks are at -12
dB, or whatever the manufacturer recommends. Always monitor the
recording with a good quality set of headphones and keep an eye on
the meters.
The sound is captured and edited with the video,
so now we’re done, right? Not hardly. Assuming you are using a
non-linear editor (NLE), there are many good options. By the way,
just as a good, high resolution, color balanced monitor is critical
for editing video, good, high resolution, flat frequency response
studio monitor loudspeakers are critical for editing audio. I have
been very happy with the Mackie HR824. At the very least, use
speakers that are specifically designed for audio monitoring.
Adding the final polish to the audio involves several steps.
(Refer to your NLE manual for instructions on how to do each of these
steps. Some steps may require the purchase of third-party plug-ins.)
First, normalize the audio. Here the computer analyzes the audio for
all the peaks and amplifies the entire track to be as loud as
possible without clipping. Now use a noise reduction plug-in to
reduce steady-state noise such as an air conditioner, etc. If the
sound source is voice, or a non-bass instrument, use a low-cut
shelving filter at 125 Hz to eliminate microphone thumps. Then listen
to the track and boost any quiet passages that need it, such as where
the talent temporarily turned or moved away from the microphone.
Then, add a compressor plug-in with a ratio of 1:2.3, and a -10 dB
threshold. This further evens out the subtle differences between the
quiet and loud passages. If needed, use a de-esser plug-in to edit
out sibilance. Edit out any thumps and bumps, clicks and clacks that
you hear (or see in the NLE audio graphic display). Listen carefully
to the sound. Does it sound natural? If not, consider using an
equalizer plug-in. A parametric equalizer is better because it allows
you to pinpoint problem frequencies. If the sound is boomy, cut the
lower frequencies. If the sound is thin, it might need a little boost
in the lower frequencies. If the sound is too bright, try cutting the
higher frequencies. If the sound is dull, try to boost the high
frequencies. Generally, a cut or boost of more than 3 dB indicates
the recording needs help--you may need a better microphone, or a
better recording venue. Once you are happy with the equalization
settings, burn a CD of the sound track and listen to it on different
speakers, including television speakers. Adjust accordingly and
refine the sound until it is no longer distracting from the message.
Now we’re in the home stretch. Mix in any music and sound
effects. Add these “spices” to support the message, not
to trample over the message. Add a subtle amount of reverberation to
the overall mix. This is akin to using a soft/fx or black dot filter
on your camera lens. It smoothes the wrinkles and adds a slight
warming color that helps the listener to focus on the message. Make
another CD and listen. Have your friends and enemies listen. Make any
final adjustments. OK, now you’re done!
Back to Top
This article introduces the basic of the hows and whys of filters
for those who are new to videography, and cameras in general. Filters
are special pieces of glass or resin that are placed in front of the
lens. (Some high-end cameras also allow filters behind the lens.)
Filters are used to enhance the image being captured by the camera.
Most filters either screw onto the threads on the front of the camera
lens, or are dropped into a filter slot in a mattebox or filter
holder. Screw-on filters come in various sizes. Stepping rings allow
a screw-on larger filter to put on a smaller lens. The major types of
filters are diffusion, colored, non-colored, and special effects.
Whether you use a mattebox, or screw-on filters, a diffusion
filter (sometimes called a soft filter) adds a look that
professionals prefer when shooting close- to mid-shots, especially of
people. The ones most recommended are the soft/fx2, or a "black-dot"
filter. Either filter give a wonderful enhancement to skin tones, but
the black dot filter gives less of a halo. Of course, the black dot
is usually more expensive, but has wider application. When using a
diffusion filter, be sure to control the iris to f/5.6 to f/11 (or as
directed by the manufacturer).
Color filters come in two
flavors: color correcting, and color enhancing. Color correcting
filters are used by film photographers and cinemagraphers to balance
color. Video cameras are usually able to "white balance"
and avoid using filters for color balance. However, when you need to
saturate or highlight a certain color, a color enhancing filter can
be used very effectively. For example, a partially orange colored
filter (or a filter partially inserted into a mattebox) can be used
to really bring out the fire in a sunset. This type of application
requires the use of a tripod. Be sure to remove the filter when
setting the white balance!
When shooting outdoors, try a
UV/haze (80A) filter, or a polarizer. A UV filter cuts some of the
haze in an outdoor far shot. Since a UV filter only blocks light that
does not photograph, many videographers leave a UV filter on the lens
at all times. This helps protect the front element of the lens from
scratches. A polarizer is used to make the cloud/sky contrast "pop"
when shooting a partly cloudy daytime scene. With the polarizer in
place, point the camera 90 degrees to the sun and rotate the
polarizer for the desired amount of contrast. A polarizer is also
used to cut glare and reflections in glass and other applications. A
neutral density (ND) filter is useful sunny outdoor and other
brightly lighted situations. Not only does an ND filter open the
iris, therefore giving the picture greater three-dimensionality by
shrinking the depth of field, but also cuts internal lens reflections
and moves the overall light intensity more toward the middle of gamma
curve. Trust me, these are all good things!
Vignette and star
filters are used for special effects. Vignette filters come in hard
and soft edge. A hard edge vignette may be used for a special effect
of simulating looking through binoculars or a keyhole. The soft edge
vignette are used to blur everything except the middle of the frame.
This is very useful for bridal portrait montage. Most non-linear
editors (NLE) have vignette plug-in filters available. You can make a
vignet filter by painting a UV filter. Use black paint for a hard
edge, or clear coat for a soft edge. A star filter is used to enhance
highlights. A star filter is great for enhancing the sparkles in the
waves on the beach, or nighttime photos of a skyline. A homemade star
filter can be created from a piece of fine mesh screen.
The
"must-have" filters are UV for outdoors and lens
protection, soft/fx or black dot for skin tones, polarizer for sky
and glass glare, and ND filter, assuming your lens doesn't already
have an ND built into it. At the very least, use a UV filter to
protect the front lens element.
Back to Top
It
is sometimes difficult for a beginning screenwriter to find resources
for how to write a screenplay--especially for the Christian
screenwriter. Before starting in this venture of video production, I
was a software engineer. As you might imagine, large engineering
projects are carefully and specifically planned in every detail. At
first, all this structure may seem constraining to the
"right-brained" screenwriter. But, in the end, structure
allows many people to work on a project and more closely deliver what
the orginiator of the screenplay intended. A film, especially a
feature film
is
a large project that always involves multiple people. The design of
large software projects follows a certain path: architectural
specification (a.k.a. marketing response document), high-level
design, low-level design, and source code. Filmmaking follows this
very closely. An architectural specification describes the project in
"50,000 foot" terms. It describes in non-specific terms the
overal functionality and personality of the final product. It also
addresses why this project should be executed by giving its purpose,
estimated budget, estimated market share, etc. In screenwriting, the
equivalent document is the "Treatment." The engineering
brother of the high-level design is the script. Using the treatment
as the guiding document, a script is produced. Aristotle is credited
with creating the Three-Act Play. More recently, Syd Field refined
the three-act play for the screen. (By the way, scripts are written
with very specific formatting. Do a little research into script
formatting before starting...this could save having to reformat it
later. There is also good software available for screenwriters.) From
the script, the next level are the storyboard, set design, costume,
score, etc. Finally, the ideas are captured in film or tape, and
edited into the final product. Of course, rewrites and revisions
occur all along the way.
Below are general guidelines for
what goes into a treatment and script. I'll cover storyboarding,
etc., in a later article (or, perhaps someone else would like to take
these?).
Treatment
(as outlined by Geoff Botkin for the SAICFF Treatment contest)
Page
1 (Cover Sheet):
Working
Title
Author
Copyright
holder
Genre
Setting
Target
audience
Predicted
rating
Estimated
production budget
Premise
Commercial
and theological significance of the project
How the film will be
distinct, fresh, unique, and superior
Pages 2 through 4 (the Story Treatment):
Here
the judge will learn about your understanding of story structure,
cinematic language, cinematic history, elements of drama, the
importance of dramatic pacing, empathetic character development,
character growth, character arc, and strong endings. For more
information, please see
http://www.independentchristianfilms.com/film/treatment.asp.
Three-act structure
(Borrowed from a Wikipedia
article on Screenwriting Theories. With examples from Time Changer*.)
Opening
Image: The
first image in the screenplay should summarize the entire film,
especially its tone. Often, writers go back and redo this as the last
thing before submitting the script. (Carlisle scolds the young boy
for stealing marbles, but does not share Christ)
Inciting
Incident:
Also called the Catalyst, this is the point in the story when the
Protagonist encounters the problem that will change their life. This
is when the detective is assigned the case, where Boy meets Girl, and
where the Comic Hero gets fired from his cushy job, forcing him into
Comic Circumstances. (The first boardroom scene where Anderson
objects to the book and wants Carlisle to meet with him)
Turning
Point 1:
The last scene in Act One, Turning Point One is a surprising
development that radically changes the Protagonists' life, and forces
him to confront the antagonist (or Opponent). (Carlisle is beamed
into the future)
Pinch
1:
A reminder scene at about 3/8 the way through the script (halfway
through Act 2a) that brings up the central conflict of the drama,
reminding us of the overall conflict. (The young girl steals
Carlisle’s hot-dog)
Midpoint:
An
important scene in the middle of the script, often a reversal of
fortune or revelation that changes the direction of the story. Field
suggests that driving the story towards the Midpoint keeps the second
act from sagging. (Carlisle comes back to his hotel and watches the
TV and drops to his knees in prayer)
Pinch
2:
Another reminder scene about 5/8 through the script (halfway through
Act 2b) that is somehow linked to Pinch 1 in reminding the audience
about the central conflict. (Carlisle’s speech at the church)
Turning
Point 2:
A dramatic reversal that ends Act 2 and begins Act 3, which is about
confrontation and resolution. Sometimes Turning Point Two is the
moment when the Hero has enough and is finally going to face the
Opponent. (Carlisle returns back home and rewrites his book)
Showdown:
about midway through Act 3, the Protagonist will confront the Main
Problem of the story and either overcome it, or come to a tragic end.
(Carlisle re-submits his book to the board)
Resolution:
The issues of the story are resolved. (Carlisle gives marbles to the
young boy and tells him of Christ)
Tag:
An epilogue, tying up the loose ends of the story, giving the
audience closure. (Anderson tries to send the Bible into the future)
* Time
Changer, Rich Christiano, www.timechangermovie.com
Like it or not, filmmaking is a group project. The better
defined and organized a project is, the better it will be executed. I
hope this gives you a starting point and some general guidelines.
Back to Top
Logline
A logline is a very short, memorable summary of the story, usually not longer than one sentence. It serves as a kind of advertisement, or a taster, and should contain at least the following information:
* The main character
* The conflict
* A hint as to how the story ends
Writing a good logline is terribly difficult, because you have to convey the atmosphere of the story in very few words without reverting to stereotypes and clichés.
Example: Jefferson Smith must pay the price to secure truth in a world of politics gone bad.
Pitch
Making a film is a group endeavor. You cannot do it alone and you will need to convince others to come along for the ride. Sharing your idea for the film and the story of the film is called "pitching" and if you want to be a filmmaker you need to get good at it.
Describe your film in 15 to 30 seconds. Avoid “high concept” descriptions -- "movie x in setting y" or "movie a meets movie b." Don't try and force your one-line description into one of these if it doesn't fit.
As with all aspects of scriptwriting, when pitching a film use visual language. Make the audience of your pitch "see" the film you are describing - sell the sizzle not the steak.
Example: Naive and idealistic Jefferson Smith, leader of the Boy Rangers, is appointed to serve as senator on a lark by the spineless governor of his state. He is reunited with his childhood hero, the state's senior senator, Joseph Paine. His simple goal of a national boys' camp throws a wrench deep into the political machine of the state's corrupt political boss, Jim Taylor. Taylor unsuccessfully tries to ensnare Smith and then attempts to destroy Smith through scandal. Smith rallies the Boy Rangers and their grassroots quest for truth finally resonates within Paine to ultimately crash Taylor's well oiled machine and grind it to dust.
Back to Top